
It's been so long since my last post but we've started working a 4 day week and then Monday was a holiday here (Victoria Day) and then a flu bug hit. I do have a great gift for you - our 2013 Summer Free Printable! Also, scroll down to see drafts of our Garden Stamps (almost done) our Coloring Contest Details and my Doll Pillow Tutorial for our Beauty and Beast Double Sided Doll.
With the 'Keep Calm' popularity I thought this would be a great freebie. It's large enough to print and frame as a little piece of wall art or add to a garden tote or apron. Simply left click on the image with your mouse a couple of times until it gets as big as possible and right click on the image with your mouse to save it to a picture file. Of course it's for personal use only but please feel free to share this link with your friends.

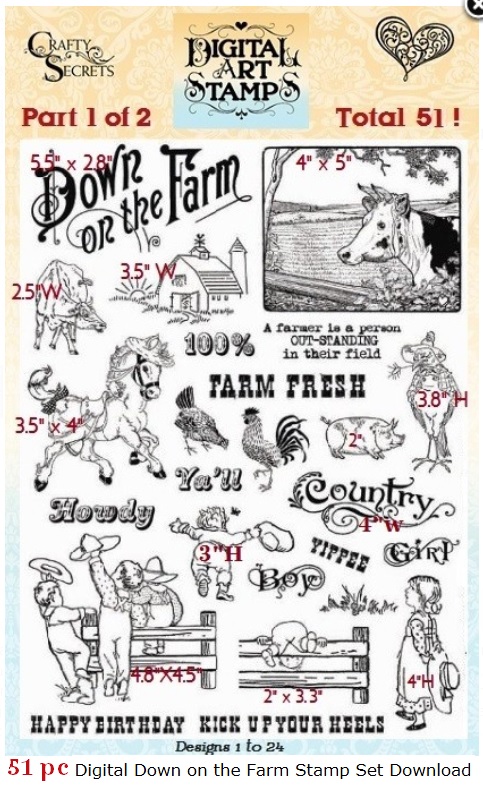
I would like to say our Garden Digital Art Stamp Sets are all ready - but they still need a few more images and words added. Here's the DRAFTS so you can have a peek at all 4 sets. There will be 3 large downloadable sets for $9.95 each and a small adorable set for $3.95.
The first will be our Flower Garden Set. The flowers are tall so you can create wall art, scrapbook pages and decorate larger garden and home decor projects - but you can reduce the size or crop the flower heads to use on your handmade cards, gift tags, etc. I've always wanted a set like this so you can change the color of the images and you don't even need to color them. You can see DT Member Sheila Rumney's Tutorial on 'How to Change the Color of a Digital Image' here on her Blog. Sheila Has some fantastic step by step Digital Tutorials and you can also visit our Tutorial Board on Pintrest with a bunch of links!


Okay, here's my tutorial on how I made a pillow doll with our Beauty and Beast Printable Download. I was embarrassed with my coloring because I just used chalk, so it's not beautifully colored with art pens or paints but it was easy and do-able if your worried about coloring. Here are the 2 pages with images to start.
We are going to have a COLORING CONTEST if you are interested. You only need to color the dolls, you don't need to make them. The winning artwork will be turned into fabric on Sponflower and winner's will receive the fabric to make their doll and a $25.00 Gift Certificate. Deadline mid June.

If it this was a PNG digital stamp and you wanted to change the color, here is Sheila's PNG Tutorial - but these are JPG files so I'm going to show you how to change a JPG color using Photoshop Elements. I changed the color of words before using the free Paint program and it works great with continuous lines, but these have a bunch of little lines so they need to be done differently.
Open up your first page in Photoshop Elements and pick the color you want to make your stamp using the slider on the color palette. If you can't see the palette, click on the drop down window menu on the right.

Select the Magic Wand tool on the left while holding down the shift key and click on the black dog with the magic wand tool. Make sure to un-check the “Contiguous”
box above as shown in the screen shot below, top right, is NOT checked. You should have 'marching ants' moving around all the black lines now.

Click the EDIT button on top — and the 'Fill Selection' from the
drop down menu and then the 'Fill Layer' window will open. Use: Foreground Color, Mode: Normal, Opacity: 100%. Then click on OK and you will see the black turn to brown (or whatever color you've picked).

You could use iron-on transfer paper to add the images to fabric but there is an easy way to cheat and use Freezer Paper (the stuff you buy at the grocery store). It's waxy on 1 side and when you iron the waxy side to some scrap fabric and it will make it stiff enough to feed through your printer - so you can have printable fabric sheets! Not washable unless you have a laser printer

I cheated and bought 50 sheets of Freezer Paper on amazon.com. I used my paper trimmer to slice off the extra fabric so I had both 'Beauty and the Beast on two 8.5 x 11" sheets.

I have an inkjet printer so I let my sheets sit for a day before coloring them but if you are in a hurry just use a heat tool or hair dryer. If you plan to use liquid pens or paints you should do a test first, or you can spray your fabric with Krylon Matt Sealer to seal the printer ink. Laser printers have permanent ink. NOTE: Later I sprayed my colored sheets with Krylon Matt Sealer, first with a very light coat and when dry a second good coat to seal everything.

I used Chalks with a sponge and a Dove Blender Pen to color the little stuff. Blender Pens have a mix of water and glycerin and you just wipe the pen tip on scrap paper until it runs clear before picking up a different color.
I had a doctors appt and was too chicken to use my new machine and mess up, so Cindy (our graphic designer and talented quilter) was a sweetie and sewed the 2 pieces I cut with a seam allowance inside out. Later, I turned it right side out and stuffed it with filling using a chopstick to push stuffing into the arms and legs. I found a new pillow at the thrift store with super soft great stuffing for $1.00 and used it. Later hand stitched head closed.

Here my finished 'Beast' doggie with buttons on his shoes, shirt and lapel. I threaded the buttons but used a glue gun to attach them. My doll is more for show but sew button on if a young child is playing with the doll.

Here is my finished 'Beauty' side and check out her voluptuous figure! I've since pushed the stuffing around so the Beast has the tummy now. I made her a little hair bow and rosette to wear and used a wire clipper to clip some pins down a bit and glued them on for earrings, shoe buttons and her purse clasp.

The best part is the doll is double sided and it was fun to add the embellishments.

The other $2.95 Double Sided Storybook Dolls include Puss and Boots, Jack and Jill, and Goldilocks and Baby Bear.
Until next time,
Wishing you joy and creativity!
Sandy
See Our CraftyVintageGirl.com
Store
Our Online Shopatron Store (sorry No digital downloads)
Visit us on
Facebook with
over 5500 Fans! Our Online Shopatron Store (sorry No digital downloads)
This Blog: http://heartwarmingvintage.blogspot.com
Our Website: http://www.craftysecrets.com
Toll Free Phone or Fax 1-888 597-8898
Local Phone 604 597-8817
Crafty Secrets Head Office
15430 78 A Ave.,
Surrey, BC V3S 8R4
USA Warehouse
250 H. Street, #436
Blaine,WA 98230


5 comments:
Thank you so much for your Keep Calm freebie and the Tutorial. Love it all~Josie
I'm happy you enjoyed it. Thanks Josie for your support!
Sandy
For your little girl with a skirt full of flowers, "For you, Nana"
I really like this flower quote (for the garden girl): Every flower is a soul blossoming in nature. ~Gerard de Nerval
Hi Sandy, for your Flower Girl digital stamp sentiment "If friends were flowers, I'd pick you".
Post a Comment